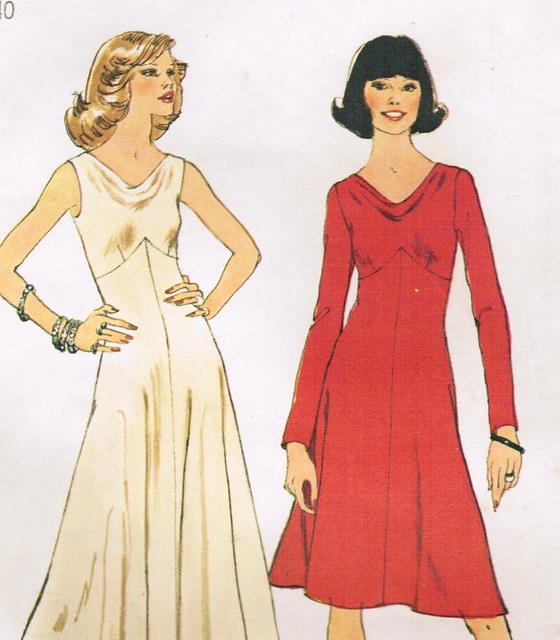
I think I might have promised some constructions notes on this some time back, right? Well, here goes. I went ahead and measured all the pattern pieces and determined that, for the most part, it would fit. I just needed to make a FBA. Even though the cowl neck portion is cut on the bias, I didn't think it would stretch enough, or that it would but look bad. Here's how to do an FBA on this type of princess seam.
1) First, go ahead and trace 1/2 of the bodice piece. Trying to do both halves will make you to stab yourself in the leg, so don't do it. Trust me.
2) Go ahead and hold the traced piece up to yourself, wear a cami or something that you can pin it to, mark your bust apex.
3) Tape it over some other piece of paper.
4) This is very similar to the Roobios FBA (seriously, go read it), but I didn't want a side dart, so I put all the fullness into the underbust gathers. You will want to redraw the stitching line using a French Curve. And also, due to paranoia, I added about .5 inches of length. Which turned out to be a very bad idea. More on that in a minute.
Ok, so moving on to construction. This thing is a FABRIC HOG! Seriously, Ooona sent me over four yards of this fabric and in the end I had enough left over to make my daughter a top. The thing about these sort of slippery slinky knits is to be very careful that you don't stretch it when laying it out in any way. I was using the ironing board to pool the excess fabric on because I could only cut one large skirt panel out at once. I didn't take photos of this part, I was busy swearing and stressing out my husband. He got over it, eventually.
In any case, I had this clever plan of using bias cut fusible interfacing, also a lesson in things Not TO DO. You can't get the iron hot enough for it to stay put. I did manage to use the velvet pressing board my Mother left to me (those things are expensive! If you ever find one under 100 dollars GET IT RIGHT THEN).
 |
| needle boards also like to collect thread |
 |
| saggy boob |
I tackled it again after my short work week. If the left side looks better, that's because I have it pinned up here. I ended up taking a good inch and a half in pinning it, went over it with a triple zigzag stitch and clear elastic for stability (and added it to the shoulders), then trimmed excess fabric. Carefully. Hooray! It Worked!
To be honest, all I did for finishing the edges was turn it under twice and use a tiny zigzag. Facings on this stuff? NOT HAPPENING. Also, finding matching thread was almost impossible, but I ended up going with dark red on the serger and a dark purple in my Mom's Viking. I really wish my Brother had been operational at this point, its a lot happier to work on knits.
Oh right, the after on dealing with Saggy Boob.
 |
| One day, I'll get new floors. *sighs* |
 |
| This are serious face, I are serious Time Lord. I have evil eyebrows, too. |
Alright then. I hope that was in some way enlightening. Also, this did show me that, other than the rounded shoulders, my doppleganger is pretty close to my proportions and reliable for early fitting.


My considerable pride in your outstanding abilities has spiked even higher. Wow, and wow, I'm astounded.
ReplyDeletei never considered the horror of thread matching this stuff...
ReplyDeletei second le pops. WOW, again!
Thanks! And the thread matching thing wasn't a huge deal, just more of a "well... lets see... what works?"
Deletethat looks amazing in the end! i don't envy you the process tho. well done for sticking with it!
ReplyDeleteThank you! I'm glad I did cause it certainly got a lot of attention, AND I met all my husband's coworkers too.
Delete